I finally broke down and ordered a Best Nest Box. If you’re not a chicken farmer or you haven’t heard of this product for some other reason, here’s the rundown:
Chickens poop on their eggs, and they lay their eggs on poop. They don’t always do it and some do it more than others, but generally you have to wash eggs, especially if you don’t collect them multiple times a day. This isn’t a huge chore, but it is a problem because washed eggs don’t last as long. Washing removes some of the ‘bloom’ — a protective layer the hen’s reproductive system leaves on the eggshell to keep microbes from getting inside.
If you’re selling eggs in the United States, you have to wash and refrigerate them, but when it comes to eggs I’m going to eat myself, I prefer to keep them unrefrigerated and wait to wash them until I’m ready to crack them open. If the eggs have poop all over them, that’s not exactly tenable — sure, the bloom is intact, but I’m leaving a bunch of bacteria there to test its limits. It’s become my practice to just feed really shitty eggs to my dogs or my pig, and save the passable ones for myself or my customers. Still, it hasn’t been ideal.
To help mitigate this situation, there are commercial nest boxes designed so that after being laid, the egg immediately rolls away from the hen into a collection area. Best Nest Box does this.
What this box also does that others don’t is to use a communal nesting design, so instead of dividing the box into one-by-one-foot ‘holes’, the box is undivided and the hens are free to lay wherever they want. Some hens like to crowd together; in my old, homemade boxes I sometimes had three hens trying to lay in the same hole. Others prefer a little solitude. With this box I’m able to respect each hen’s individual wishes, even if they don’t always extend the same courtesy to each other.
If you want more information you should get it from the company. They have some good videos, too. Here’s their site: https://bestnestbox.com
I ordered the large unit because I have about fifty hens. The assembly instructions are fairly straightforward, as long as you know the difference between a flange nut and a locknut and you have some basic tools. Specifically you’re going to want two 7/16” wrenches, a 3/8” wrench, and a Philips head screwdriver. There’s a small job for some pliers, too, but I used my thumb instead and it was up to the task. I also used a drill to install the unit in the barn. If I ever decide to order a bunch of these at once I’ll offer to cook dinner for a group of people if they each assemble one nest box — it’s easy, but it’s kind of slow.
I ripped out my old boxes this morning and installed the Best Nest Box in the same location. My one and only complaint with the unit’s design is that it’s meant to be mounted to the wall with only two, very small tabs, and I’d prefer a little redundancy. For that reason I kept the 2×4 frame that sat under my old boxes. If I hadn’t had that I would probably remove the bolts from the back of the unit and drive some screws through those holes and into the studs in the wall — this would be preferable to drilling new holes through the back of the unit and would result in a more sturdy mount, as the screws would pass through two pieces of sheet metal instead of just one. If you order one, I think you’ll understand what I mean.
Here’s my nest box installed:

I left enough room for a second box should I decide I need one, but for now I think one will do the job. My old boxes were a little over seven feet long, and this is a four-foot box, which is why it hangs off the edge of the wood frame a bit.
Even though my old boxes were bigger, with fourteen individual holes, a lot of the holes went unused, and besides having a problem with shitty eggs, I also had broken eggs and birds crowding into holes that were too small for them. This box is smaller, but it will accommodate all my hens better because of the efficiency of its design. My old boxes will go in the pigeon loft, where they should be a welcome addition.
To make sure my hens weren’t afraid to go into the new box, I pinned up the curtains using a board with magnets embedded in it — you definitely don’t need one of those, it’s just something I had from a different project, literally inches from where I installed the nest box. (I thought to myself, ‘I should go to the hardware store and get some magnets. Wait, I already have some magnets, don’t I? Where would those be? Oh yeah, right there, about an inch and a half from the goddamn nest box.”) Anyway, here it is with the curtains up:

An alternative is to just wait to install one section of curtain. Here are a couple of my hens checking things out, almost immediately:
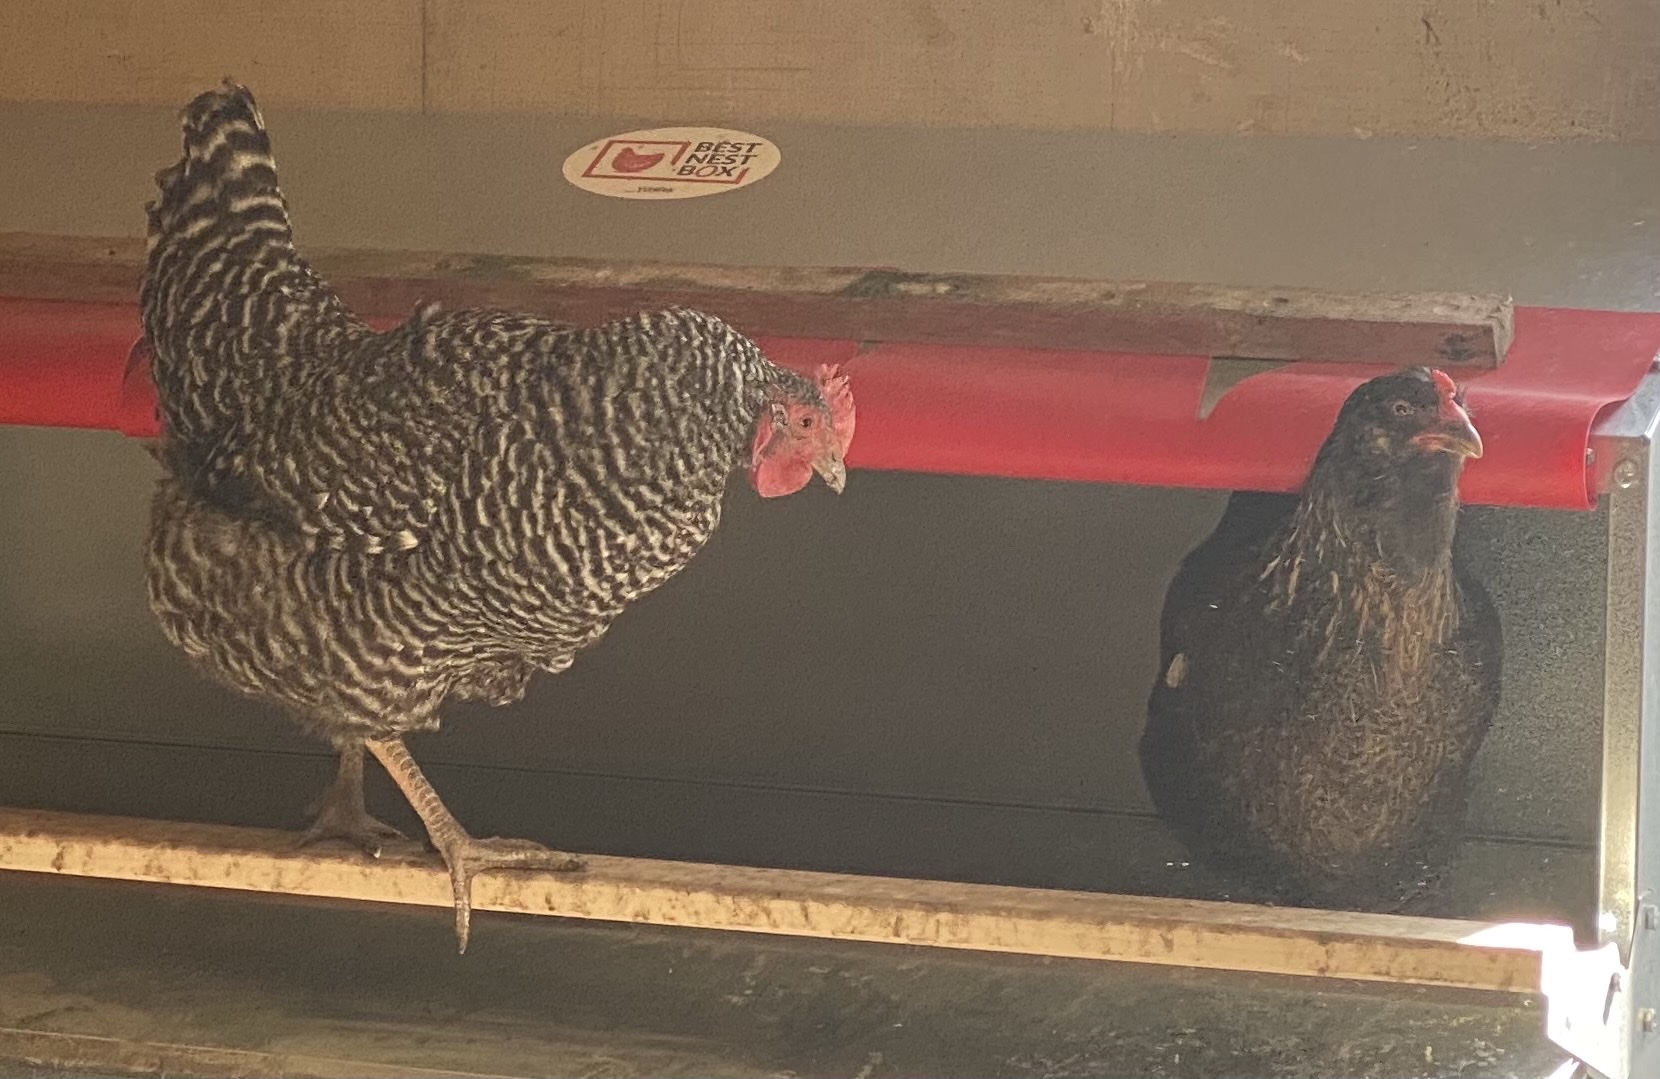
It didn’t take long at all for the hens to start using the box. I checked it periodically over the next few hours and there were two or three birds in it every time I checked, so I dropped two of the three curtain sections. They do seem to appreciate being able to cram themselves close together. By 1:00 I had five eggs already, which is pretty good considering some of the hens aren’t laying yet and some others had already laid their eggs in the old boxes this morning.
Here’s a short video I made of how the box works, using a ceramic dummy egg:
At the end of the day, I had a dozen, fresh, clean eggs in the collection tray and I flipped up the perch to keep anyone from sleeping inside the box overnight. In the morning I’ll flip it back down; there’s also a little gadget you can order to pop the perch back down automatically in the morning, in case you want to stay in bed. Yes, I will be looking into this item.
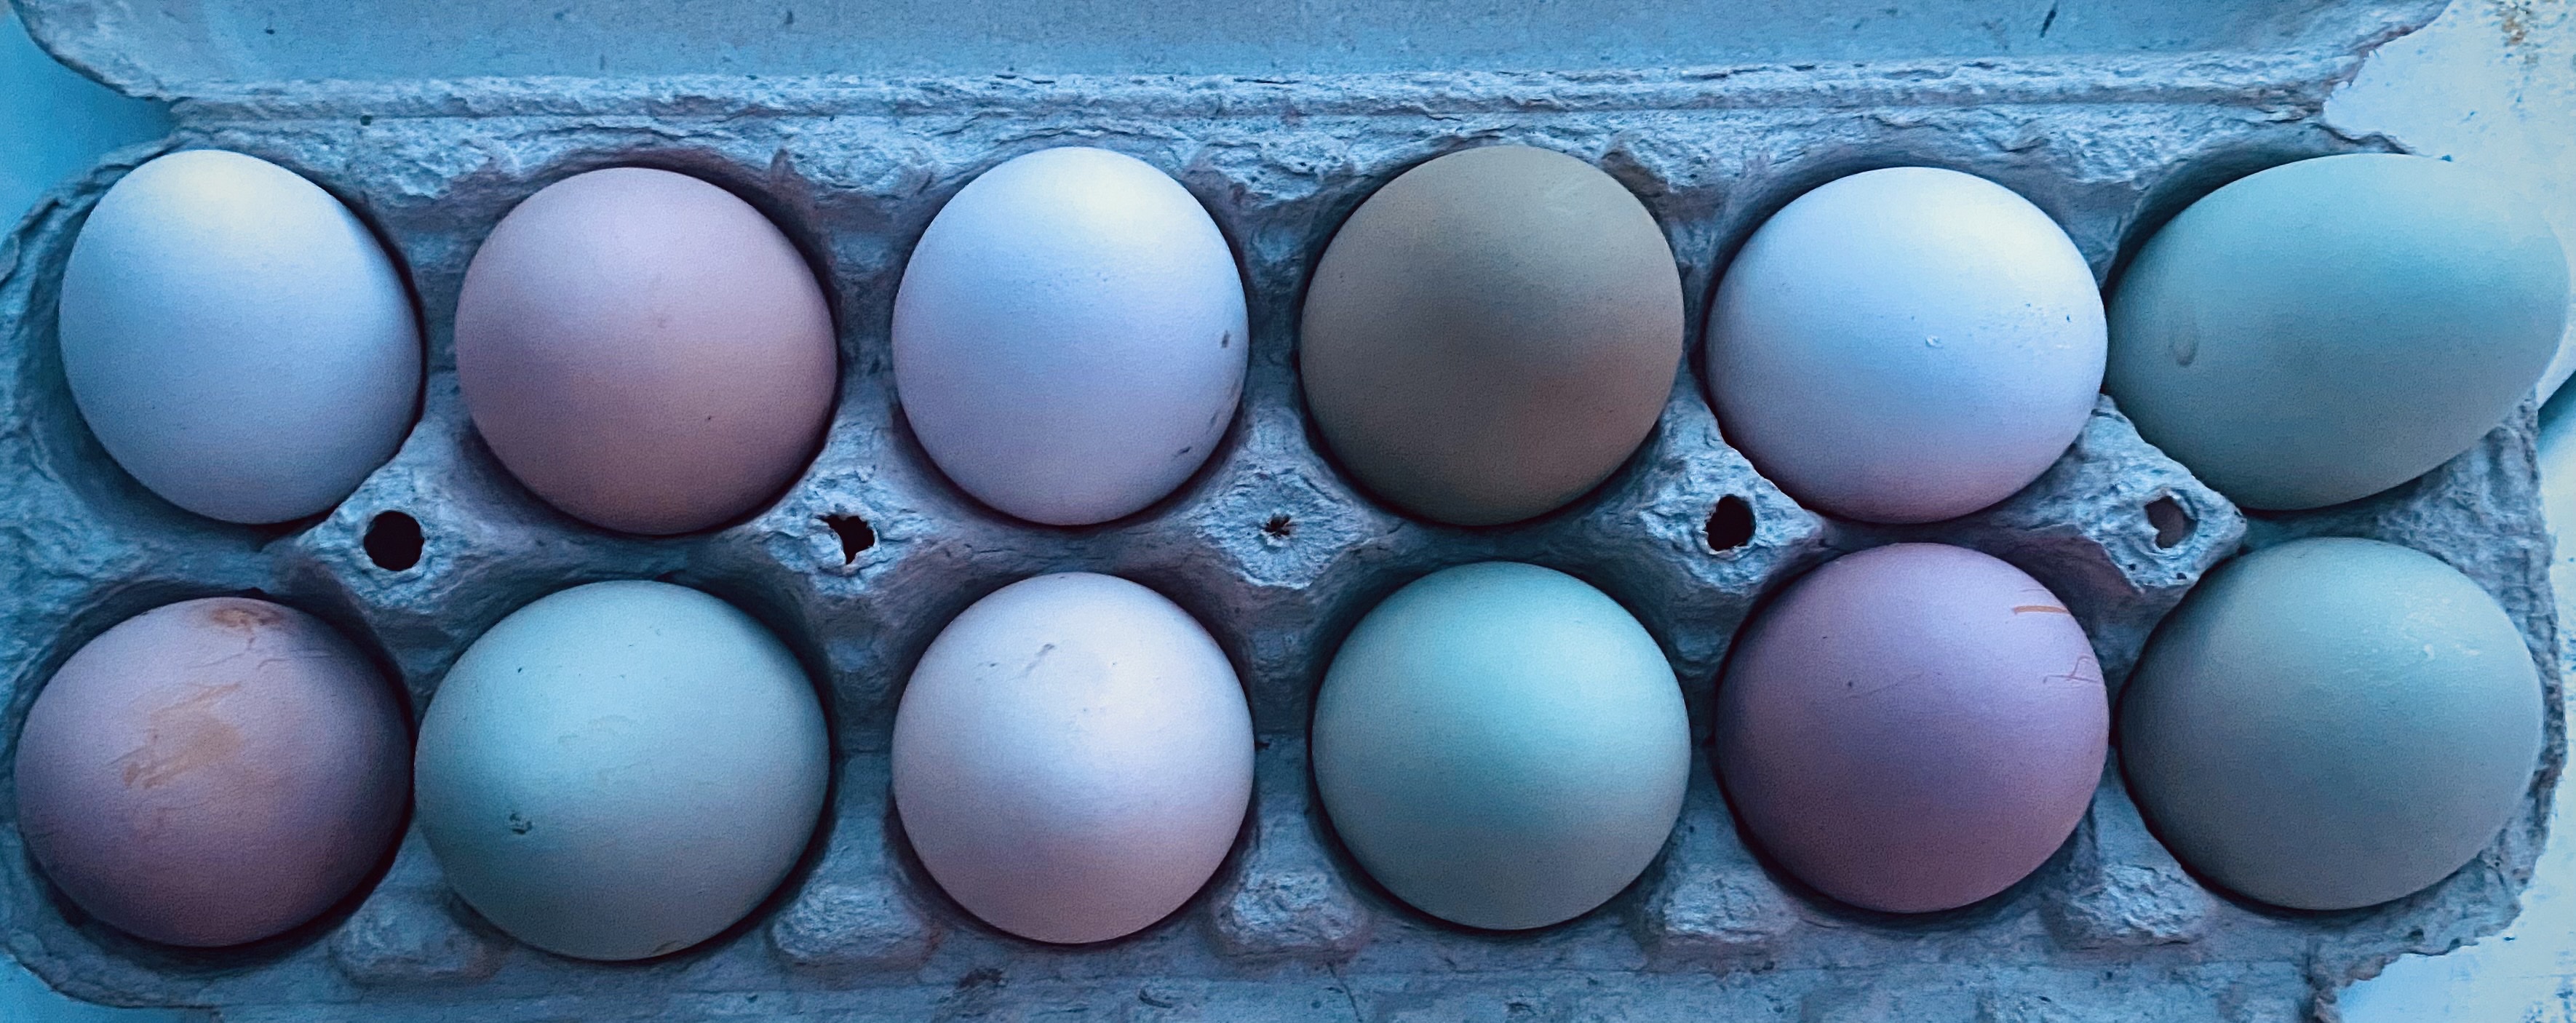
Not bad for a first day. The season’s just starting, so production should pick up day over day. When the Marans and Penedesencas get going I’ll have even more contrast.
Overall I’m pretty happy with this purchase. Cheap? No. Worth it? I believe so.
